


Our Home Renovation Before and After: Everything We Changed (and What We'd Do Again)
Updated: Oct 1
If you've followed along for a while, you know this semi was actually our second home and our second renovation, not our first. Our very first house was a full gut job, so when we bought this one, we figured we already knew what we were getting into and that this one would be the "easy" project by comparison. It was newer, and it didn't need every wall ripped out.
In a lot of ways, we were right. But it still turned into months of work, decisions, and lessons we didn't see coming.
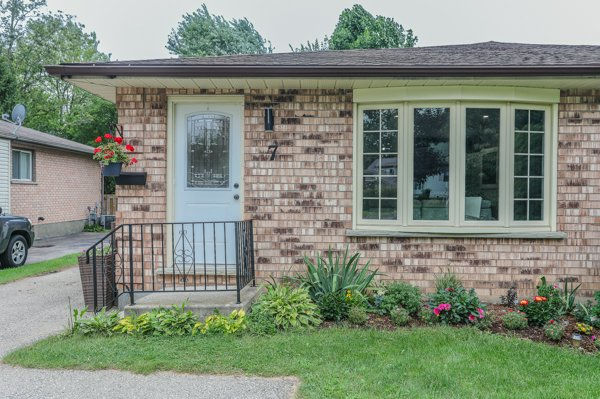
We bought this house knowing it needed work.
What we didn't quite grasp was how much it would still teach us, about renovating, about budgeting, about what actually matters when you're building a home from a house that needs it. Room by room, project by project, we turned it into somewhere we genuinely loved living. Today I'm finally pulling that whole journey together in one place: the full before and after of house number two.
Grab a coffee. This one's a long, satisfying scroll. 🏡
A quick thank you before we dive in: many of the final "after" photos throughout this post were taken by the incredibly talented Candice at CVD Photography, courtesy of our realtor.
I Bought a House With a Vision (And a Very Long To-Do List)

Every renovation starts the same way: with a lot of hope and not quite enough information about what you're getting into. That was us, standing in a house full of potential and thinking, we can totally handle this.
We'd already renovated one home together, but this one still came with its own set of decisions we hadn't faced before. What we did have was a clear picture of what we wanted this home to feel like, and the willingness to figure the rest out as we went.
If you want the blow-by-blow of that very first walkthrough (including all the feelings that came with it), I actually wrote about the day we got the keys — it's a fun one to look back on now that the dust has settled.
The Kitchen Transformation
If there's one room that tells the whole story of this renovation, it's the kitchen. It went from the most-used, least-loved room in the house to the space where we actually want to spend our time.
What We Started With
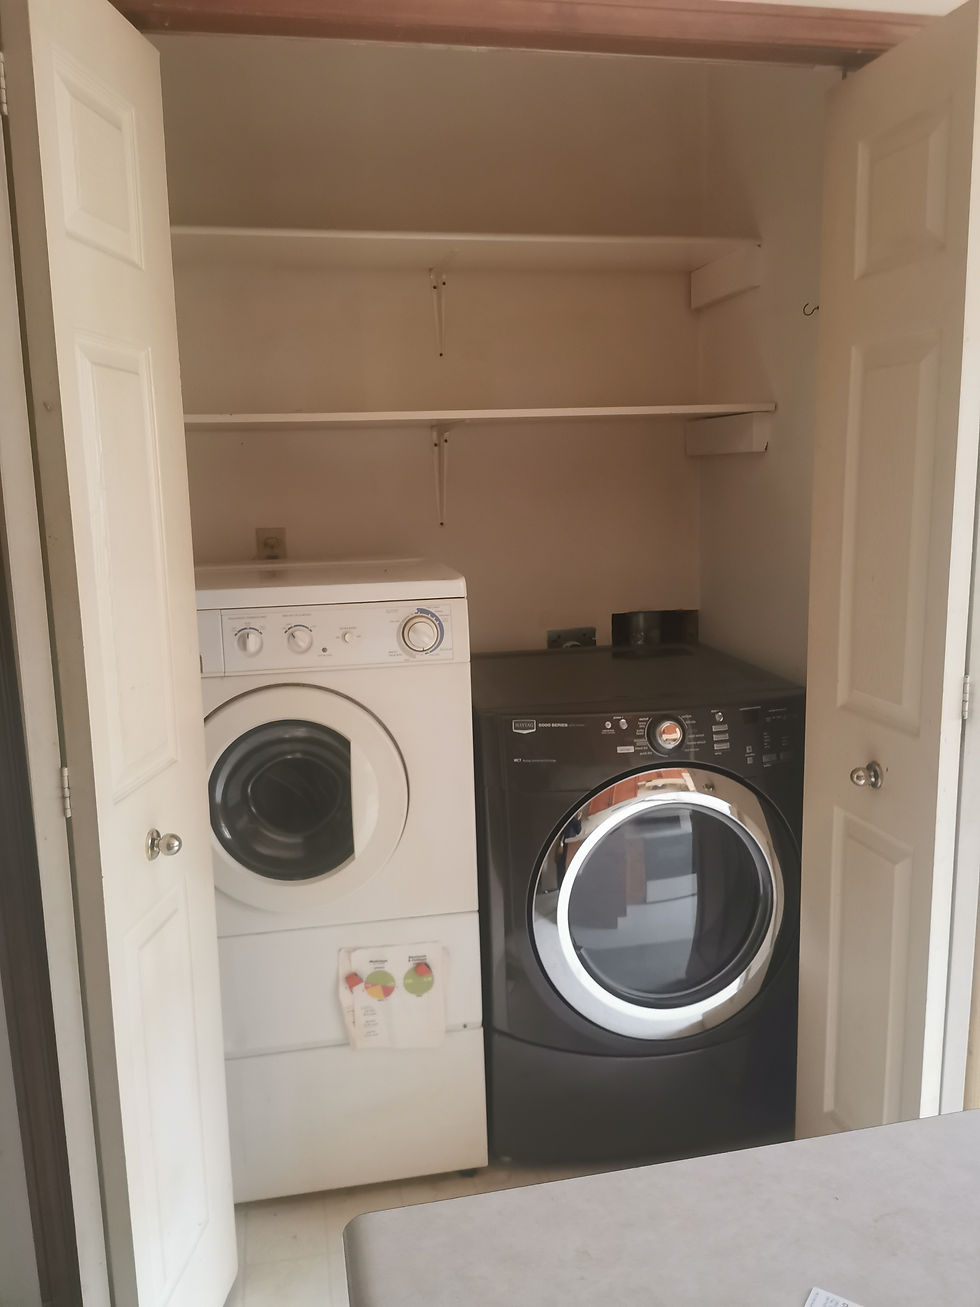
We inherited a kitchen that was functional, but it wasn't us. Dated cabinets, a layout that didn't work for how we actually cook and gather, and a lot of missed potential. Plus, the kitchen doubled as the laundry room when we first got it and I knew I wanted a dedicated laundry area that wasn't where I was cooking so the kitchen had to go!
The Kitchen Before

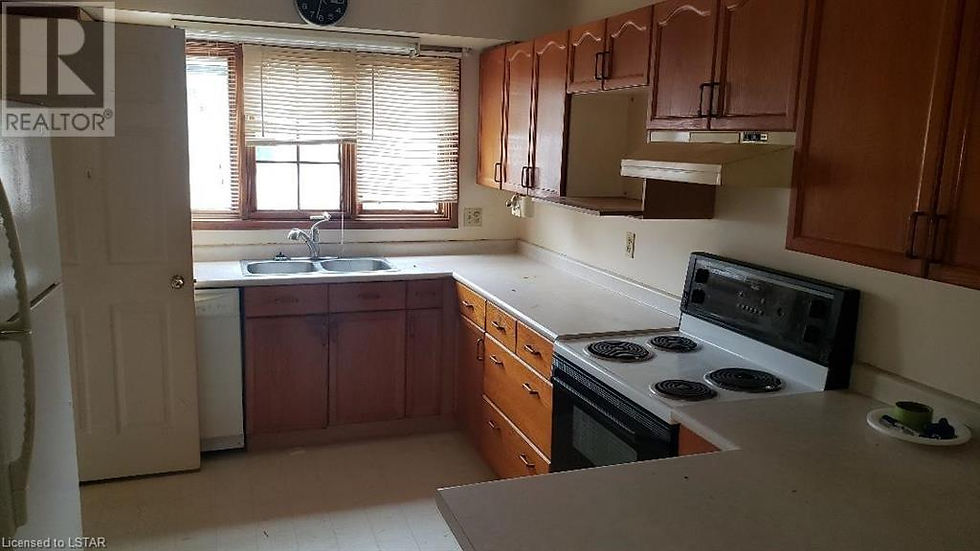
What We Changed
New cabinets, a layout that finally made sense, and all the little details that make a kitchen feel like the heart of the home. We rethought the flow of the space completely, where you stand to cook, where the family gathers, where everything actually needs to live so you're not hunting for it mid-recipe.
This was one of the projects we documented most closely at the time, and if you want the full week-by-week of how it came together, that post is still up on the blog.
The Kitchen After
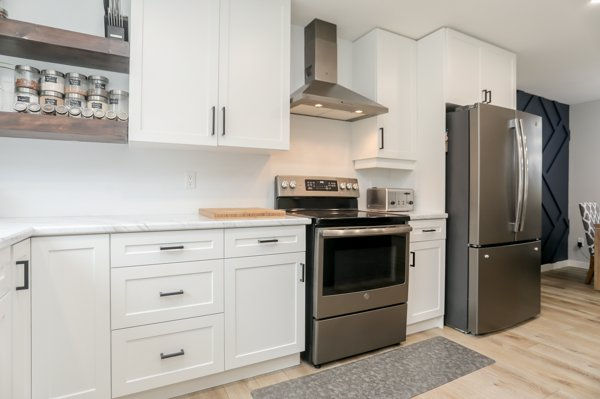

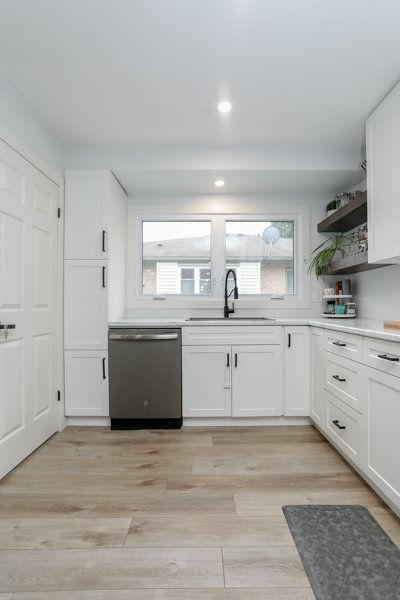
Photo Credit: CVD Photography
Looking back, the kitchen is the room that taught us the most about renovating with intention. It's easy to get caught up in what looks good in photos. It's a different thing entirely to design a space you'll actually use every single day, for years. We tried to keep that front of mind with every decision, right down to the smallest details.
Out of every room in this house, the kitchen was probably the most dramatic transformation and it's the one I loved the most. I still loved that kitchen even three years later, and if I'm honest, the one thing I still miss from this house is the open-concept layout, since our current home doesn't have it.
What Are the Best First Renovations to Tackle in a Fixer-Upper?
If you're staring down your own renovation and not sure where to start, this is the question I get asked most. The short answer: start with what you can't see.
For context, our house wasn't actually old, it was about 30 years old, and honestly the newest home we'd ever bought. It just hadn't been well maintained, and the changes we wanted to make meant additional electrical and plumbing work, even though we left the existing systems elsewhere untouched.
Electrical, structural issues, and anything hiding behind your walls should come before anything cosmetic, it's a lot easier to fix a layout or a lighting plan before your walls are finished than after. We took this approach ourselves, tackling framing and lighting early, and it saved us from redoing work later. One home renovation blogger put it well: the best approach is to take it one step at a time, trust the process, and not worry about the mess while you're mid-project.
Once the bones of a space are sorted, that's when the fun, visible work, paint, cabinets, styling can actually stick.
Room by Room: The Full Home Renovation Before and After
Beyond the kitchen, almost every room in this house got some love. Some required major layout changes and construction, while others prove you can completely transform a space with a few relatively simple updates. Here's our home renovation before and after, one room at a time.
Master Bedroom & Ensuite
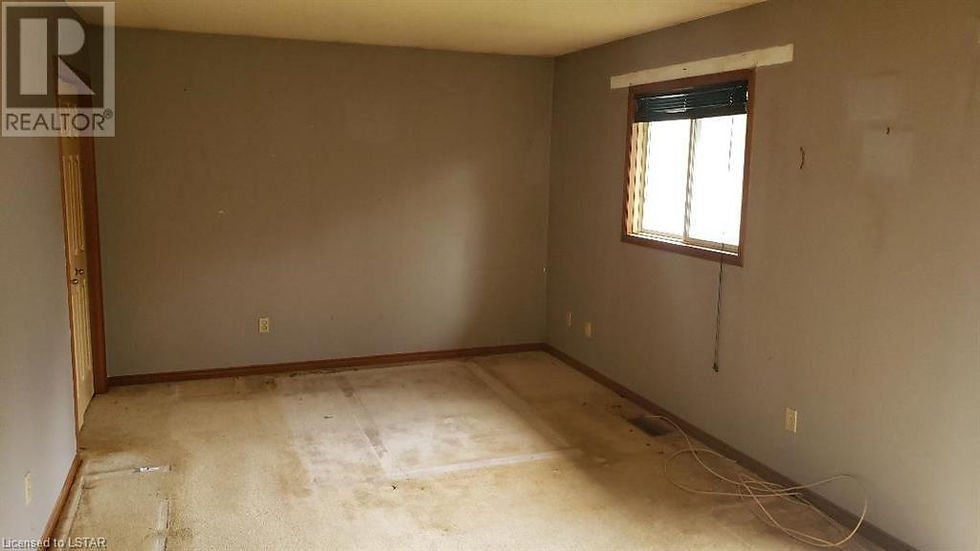
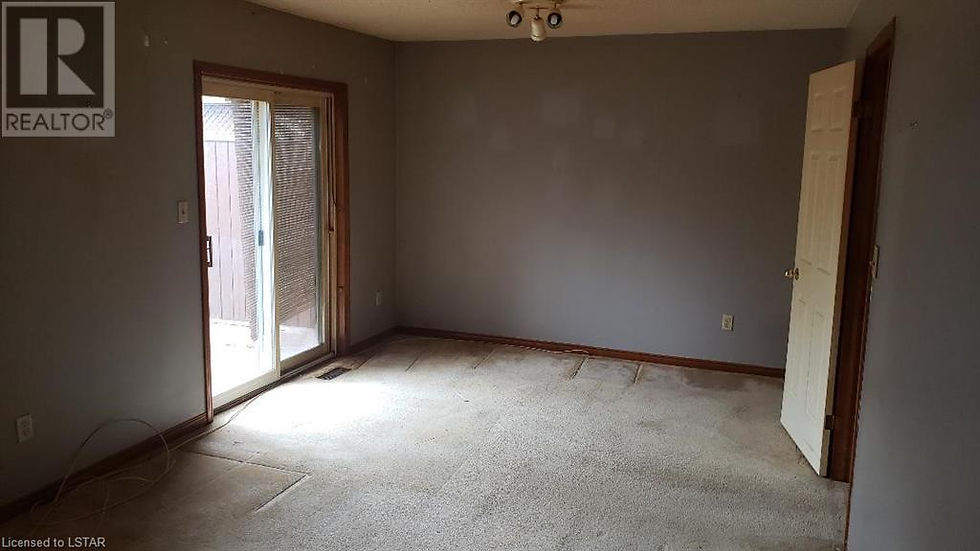
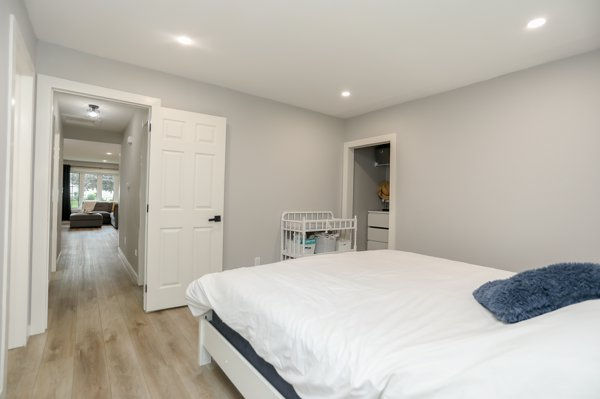
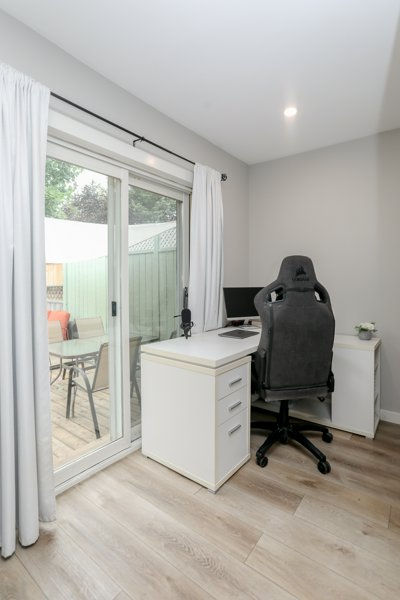
When we purchased the semi, the primary bedroom was a whopping 35 feet long, but somehow only had two tiny closets on opposite ends of the room. There was plenty of square footage, it just wasn't being used very efficiently. We reworked the layout to add a walk-in closet and an ensuite, which made the room so much more functional and gave us the storage and privacy you'd expect from a primary suite.
Before
After
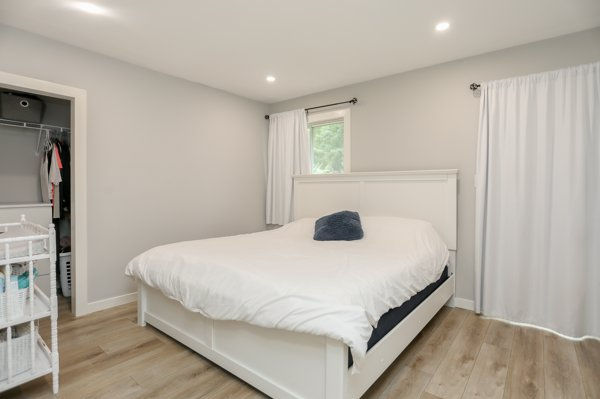
Kids' Bedroom
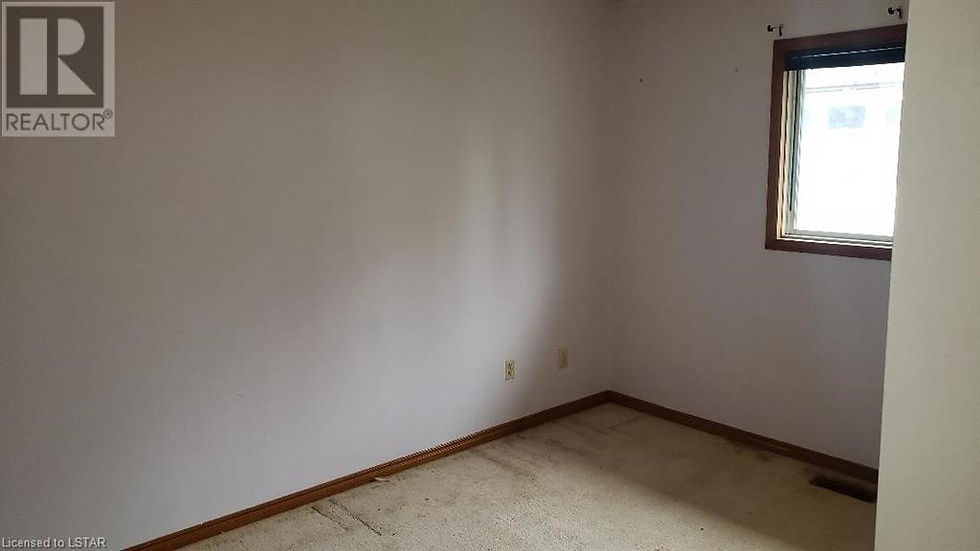
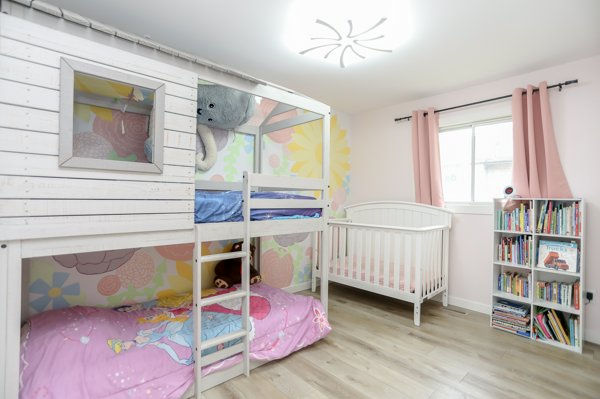
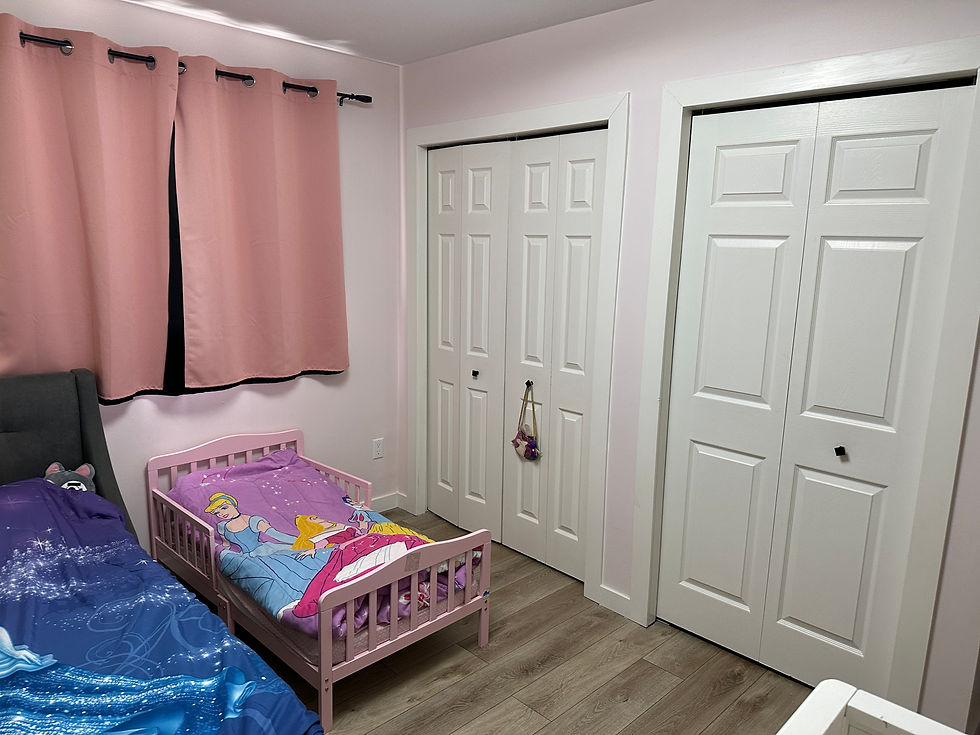
The kids' bedroom didn't require a major renovation, but we did steal the closet from the oversized primary bedroom to add a second closet, giving us a little more storage for a shared kids' room.
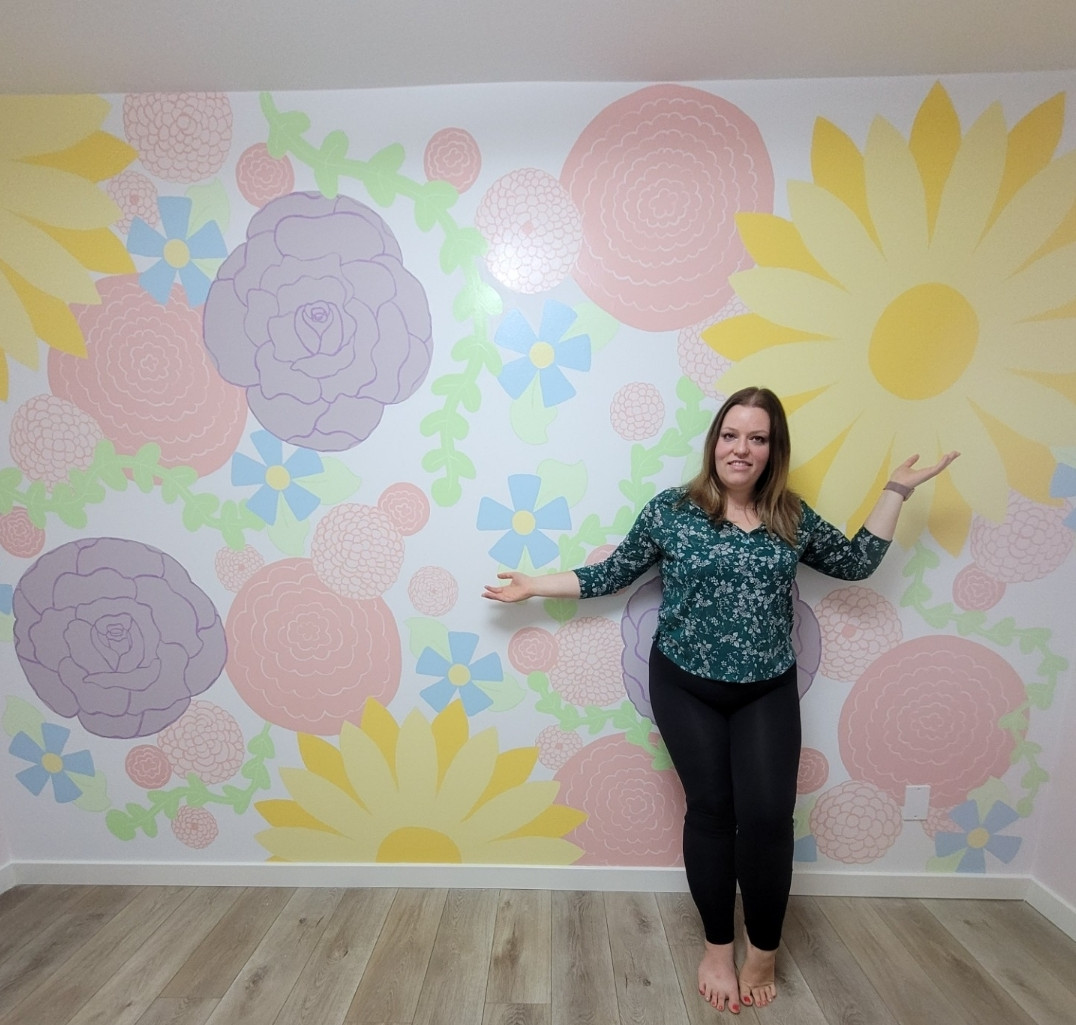
When I originally decorated this room, we only had the girls, which explains the decidedly feminine theme! Rhett and Luca came along later, and had I known we'd eventually have boys using the room too, I probably would have chosen something a little more gender neutral. Regardless, the hand-painted mural became one of my favourite details in the entire house, but I'll share more about that further down.
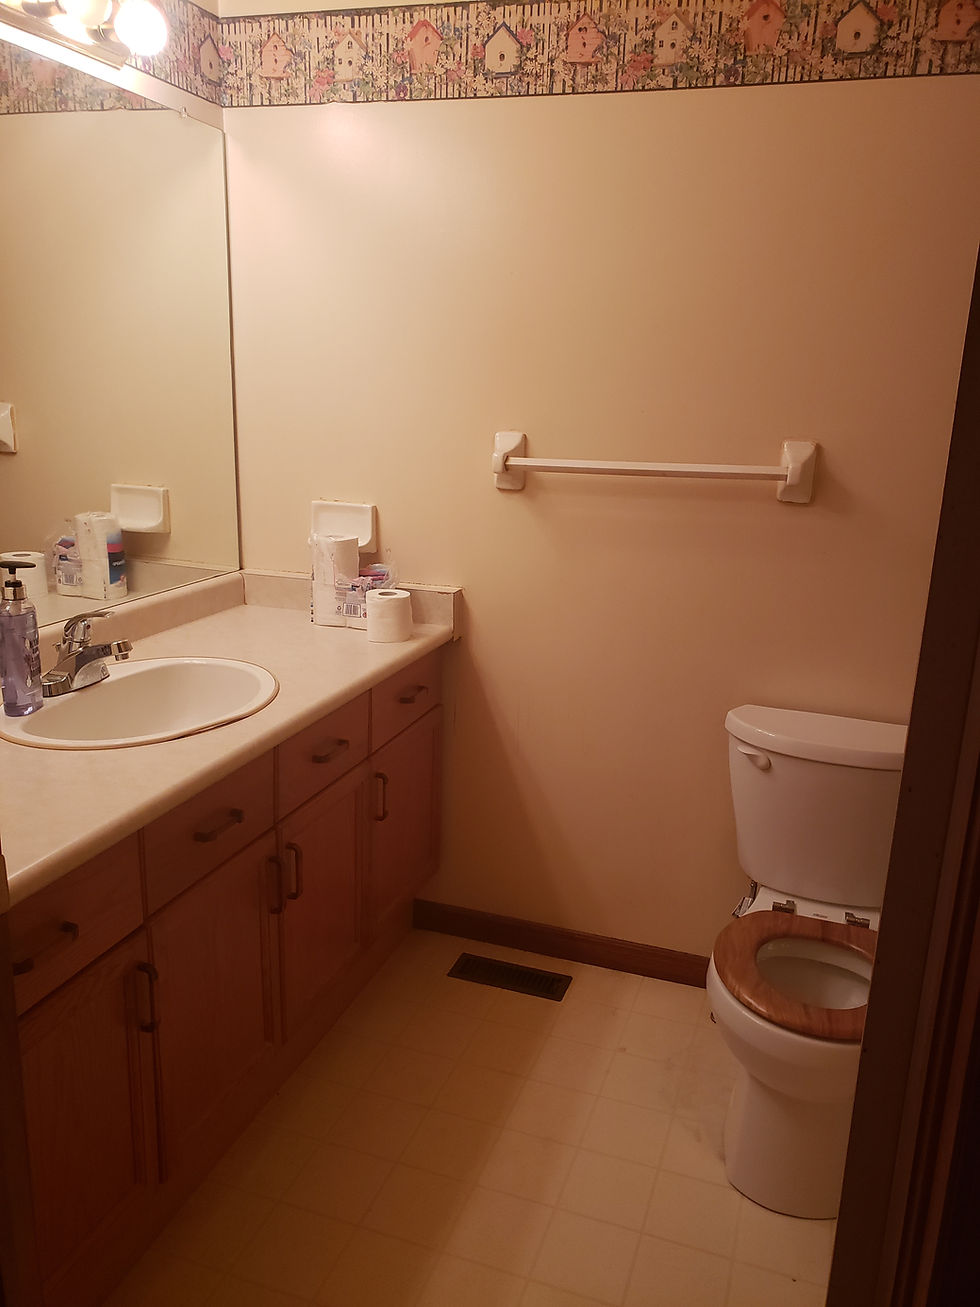
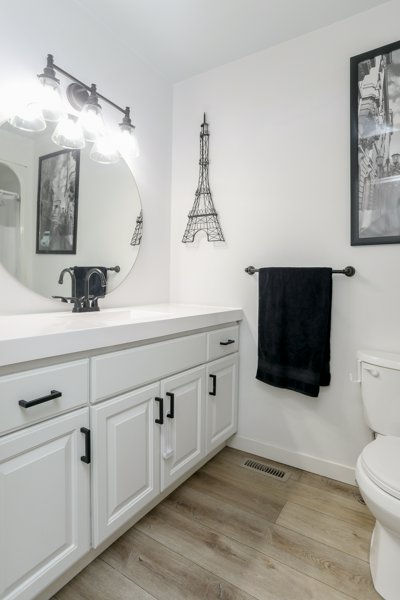
Main Floor Bathroom
The upstairs bathroom was dark and dated when we moved in, so our goal was really to make it feel lighter, brighter and more modern. A lighter wall colour paired with a new vanity and countertop made the room feel surprisingly bigger without changing its footprint.
I also decided to have a little fun and painted the ceiling light blue instead of the traditional white. Unfortunately, I chose a blue that was so light I don't think most people even noticed it. 😂 I still love the idea, though, and I'd absolutely try it again in another house — just with a bolder paint colour next time.
Living Room
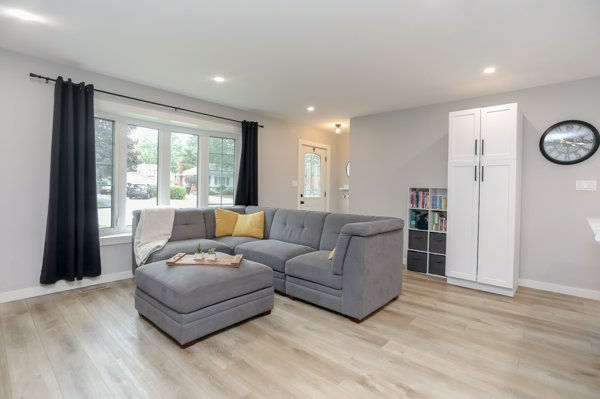
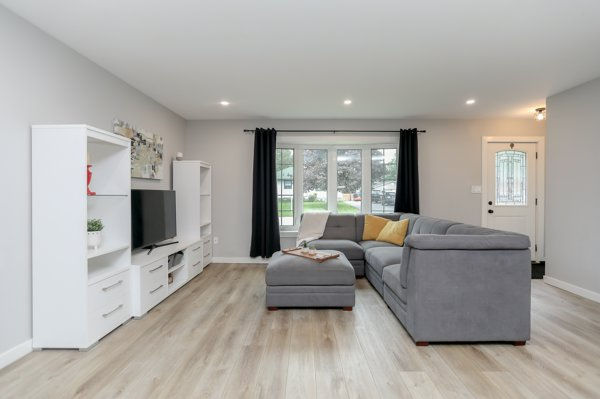
Personally, I think the living room might have had the most dramatic home renovation before and after in the entire house — but I'll let you decide.
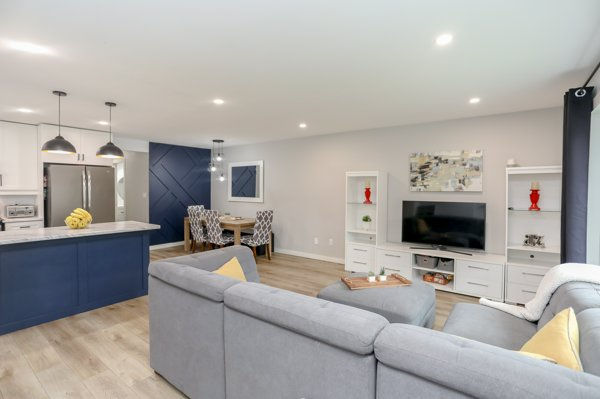
We removed the non-load-bearing wall separating the living room from the rest of the main floor, and it was easily one of the best decisions we made. It gave us more usable space and completely changed how open the house felt because, well...it actually was open now.
I love an open-concept layout for entertaining, but with young kids, it was also incredibly practical. I could be working in the kitchen while still being able to see what the kids were doing in the living room. It worked better for our day-to-day family life and made the main floor much more appealing when it eventually came time to sell.
Before

After
Dining Room
I wanted each area of the house to have something that made it feel unique, and in the dining room that became the accent wall. I wanted something bold that would draw your eye toward the back of the room and help ground the space, so we chose a deep navy that complemented the navy kitchen island while bringing another pop of colour into the main floor.
I'll share more about the accent wall — and why it became one of the most commented-on features in the house — further down.

Basement Family Room
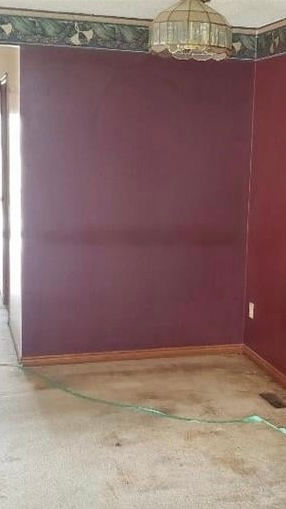
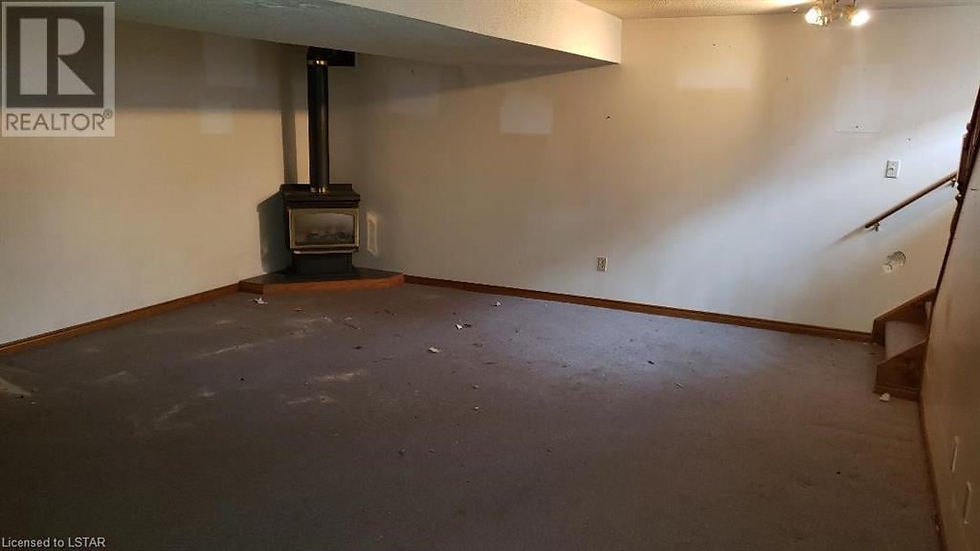
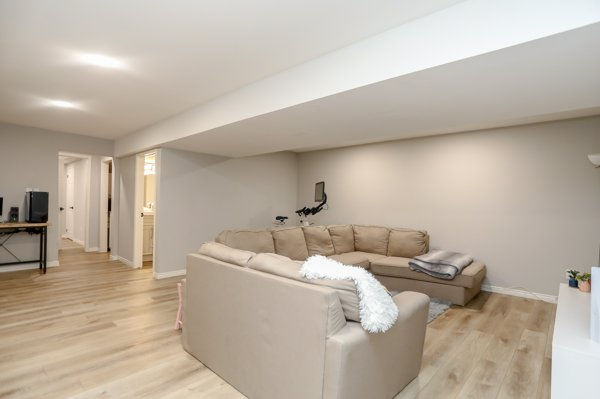
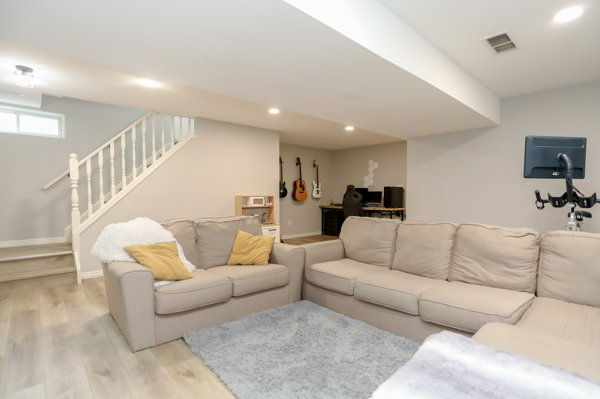
The basement family room started out feeling darker and more closed in than we wanted, especially with the wood-burning furnace taking up space in the room. We removed the furnace and chose lighter finishes throughout the space to make it feel bigger and brighter.
We also installed pot lights, which made a surprisingly big difference. Not only did they give us much better lighting, but because they sat flush with the ceiling instead of hanging down into the room, they helped the basement feel a little taller and more open too.
Before

After

Downstairs Bathroom
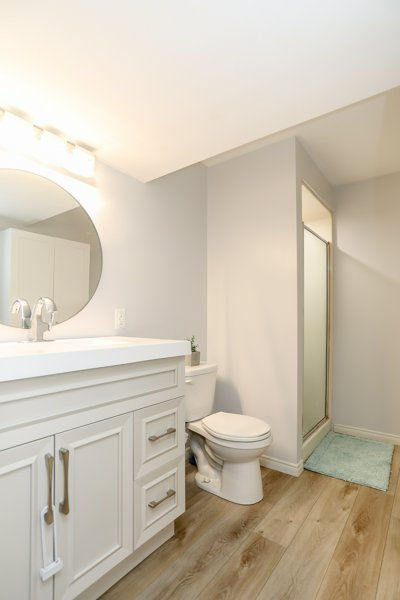
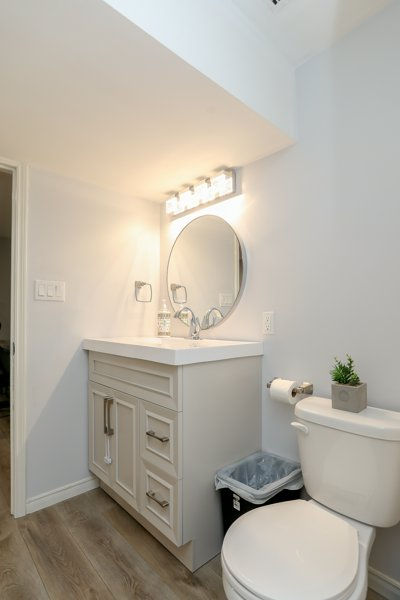
The downstairs bathroom looks so much prettier in the after photos, but this is actually a great example of how you don't always need a massive renovation to completely change a room.
We didn't move walls or change the layout. We painted, installed new flooring, swapped in a different vanity and replaced the light fixture. Nothing was particularly difficult or time-consuming, but together those relatively simple updates finally brought the bathroom out of the '80s and made it feel like it belonged with the rest of the house.
Before

After
Downstairs Bedroom
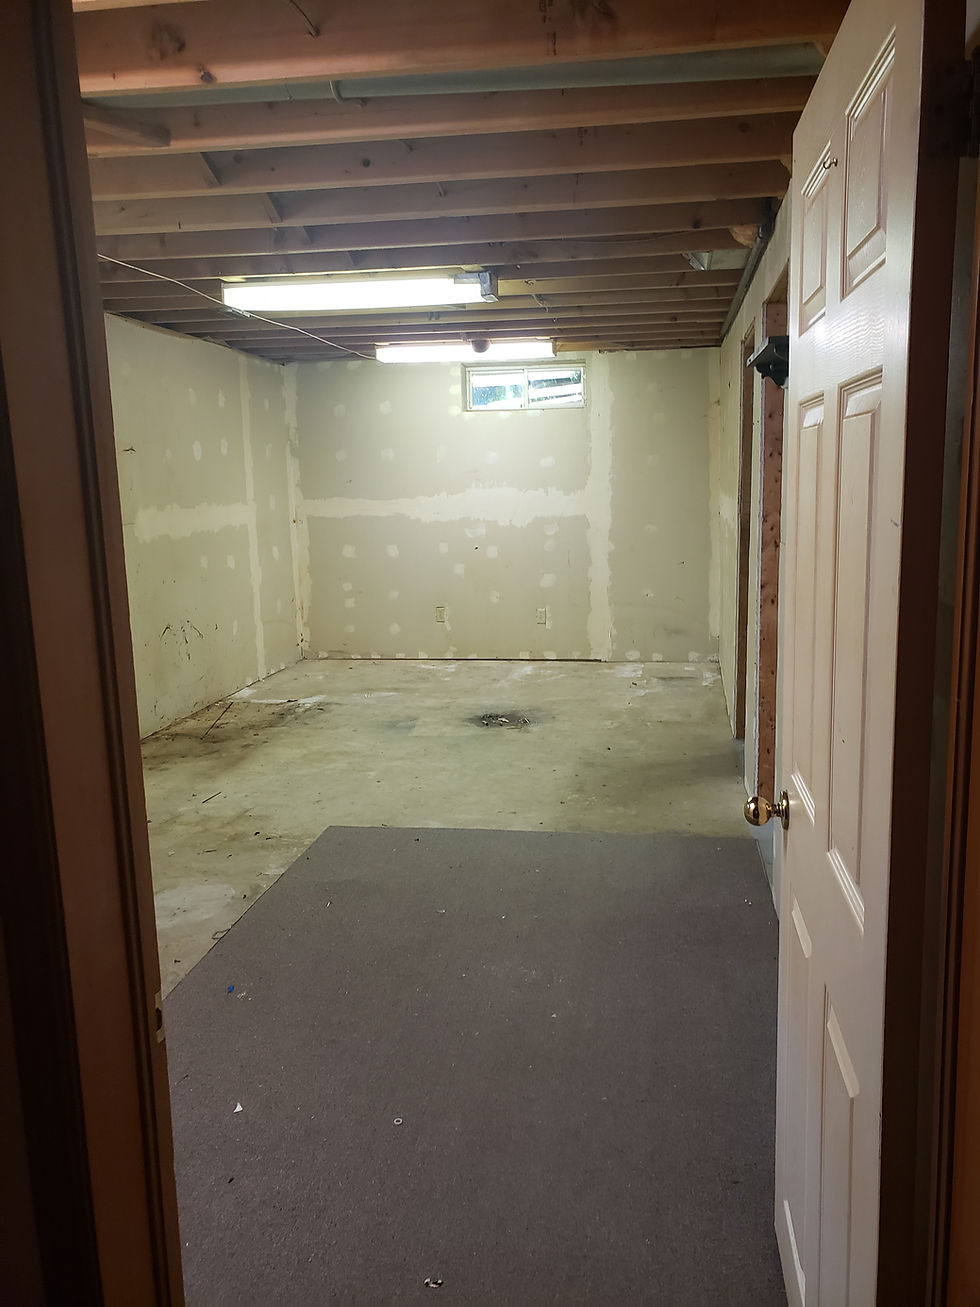
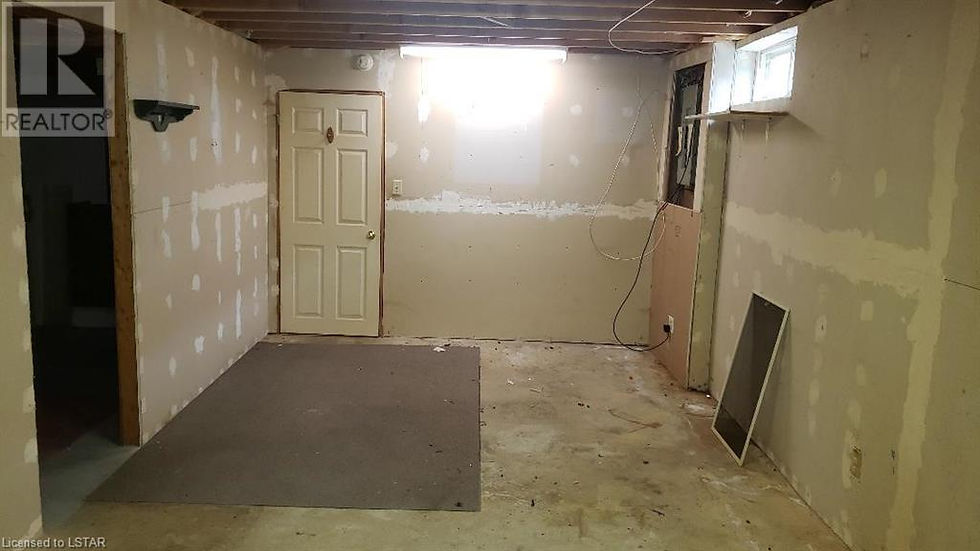
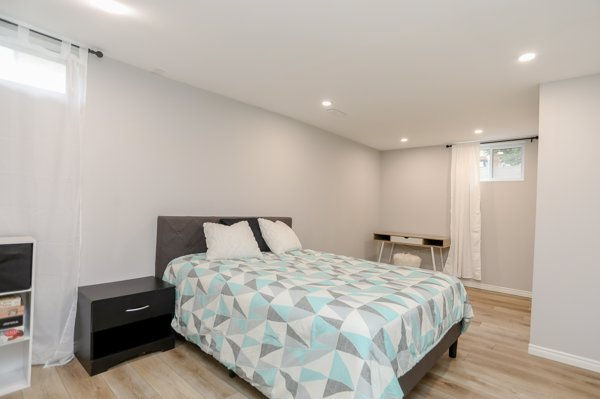
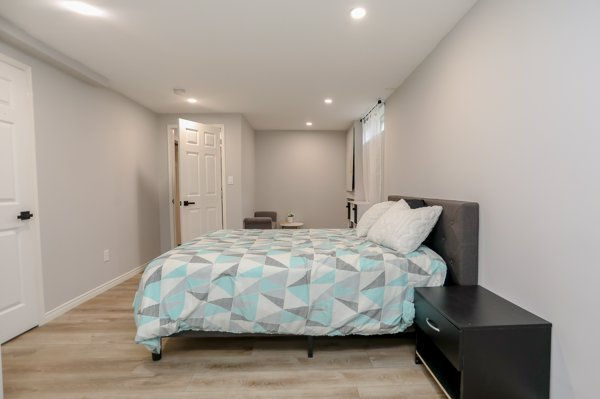
The entire back section of the basement was unfinished when we bought the house, but I could see the potential to turn it into a legal bedroom and add genuinely usable living space to the home.
That required more than simply finishing the walls. We installed a larger egress window, added a closet, moved the laundry room door and built a hallway so you didn't have to walk through the bedroom every time you needed to access the laundry room.
It took some careful planning and quite a bit of work, but I think it was completely worth it in the end. We took unfinished space and turned it into a functional legal bedroom that we were eventually able to rent out.
Before
After
Laundry Room
Apparently past Brittany didn't think the laundry room was worthy of its own before photos, so you'll have to settle for a video instead. Sorry! 😂
Along with moving the entrance when we created the basement bedroom, we used the laundry room for some much-needed overflow storage. I don't have a photo showing the left side of the room after the renos, but that's where we kept our spare fridge and freezer along with a small butcher-block cabinet. When we rented out the basement bedroom, that little setup gave the space a basic counter area alongside the extra fridge and freezer.
Before
After

Small Upgrades, Big Impact
Not every transformation needed its own room reveal, some of the changes that made the biggest everyday difference were smaller than that. Here's where the rest of the magic happened.
Closets & Storage
Small changes here made a surprisingly big difference in how the whole house functioned day to day. Good storage isn't glamorous, but it's the kind of upgrade you feel every single day.
We closed in the closet in the master bedroom and built a walk-in closet for storage.
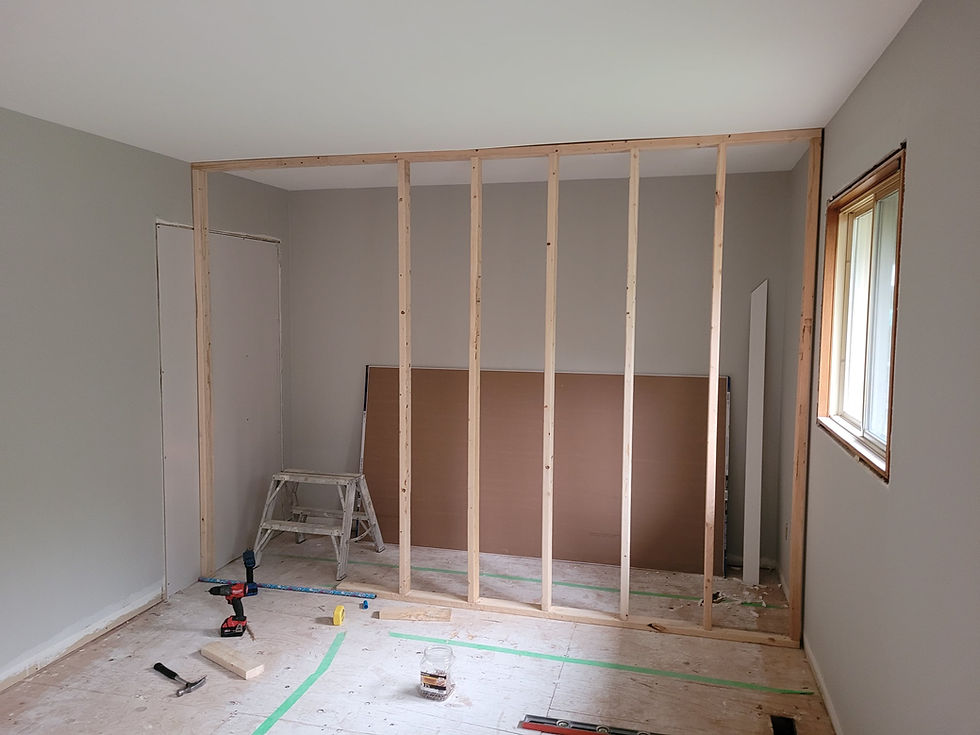
Once we closed on the closet in the master, we opened it up in the second bedroom (the closet on the left) to create a second closet for extra storage. If you have kids, you know you can use all the storage you get get for their clothes and toys!
Lighting Throughout the House
New lighting changed the entire feel of this home, brighter, warmer, and finally reflecting the vibe we were going for instead of whatever came with the house.
Finding the right lighting solutions was honestly one of the hardest parts of the renovation. Areas like the basement were so dark (see below) and certain fixtures, while pretty cast huge shadows that I didn't like in some areas but not in others.
Grayson spent a lot of time holding fixtures up for me...
Because there was a lot of trial and error with the light fixtures. Especially in the girls room, in the end we went with this one and I think it's super cute!
And we moved the shadow casting basement fixtures upstairs and they worked much better in the entranceway, hallway and stairwell. The style and colour matched the fixtures in the house nicely and I loved that they came in a 4 pack, making them super affordable!
If I couldn't find a light fixture that worked, I had the electrician add pot lights to brighten the spaces. It work especially well in the basement.
Basement Window → Legal Bedroom
This one wasn't glamorous, but it might be the project I'm proudest of. We installed a larger basement window to bring in the natural light (and meet the requirements) needed to turn that space into an actual legal bedroom, instantly adding real, usable square footage to the house.


It's the kind of project that doesn't photograph as dramatically as a kitchen reveal, but it's the one I'd tell anyone renovating a fixer-upper to prioritize because it instantly increases the value of your home. Behind-the-scenes upgrades like this one add real value and functionality, even when they don't get the attention the pretty stuff does.
The Outdoor Glow-Up
The inside of the house wasn't the only thing that got a total transformation. The outside needed just as much love, and honestly, some of these projects ended up being the ones we use and enjoy the most, day to day.
A More Functional Deck
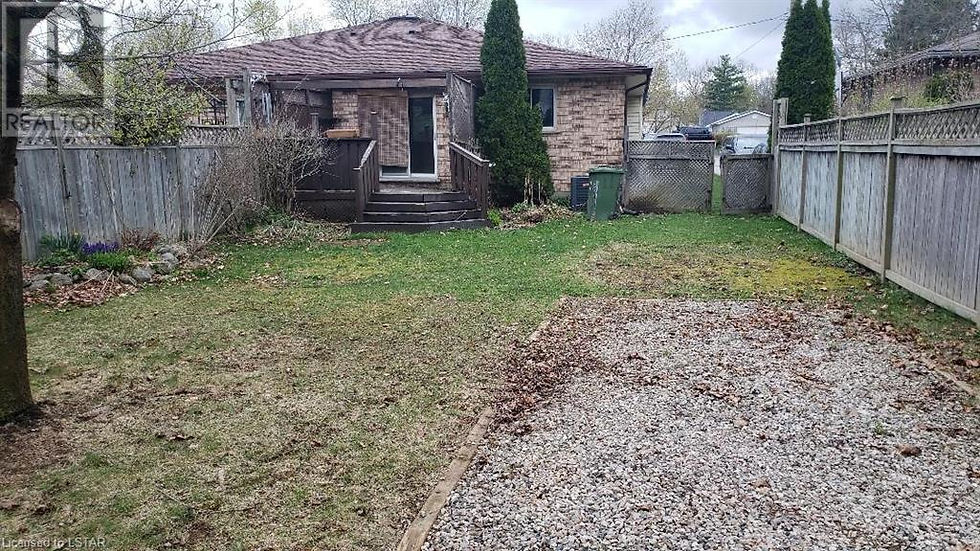
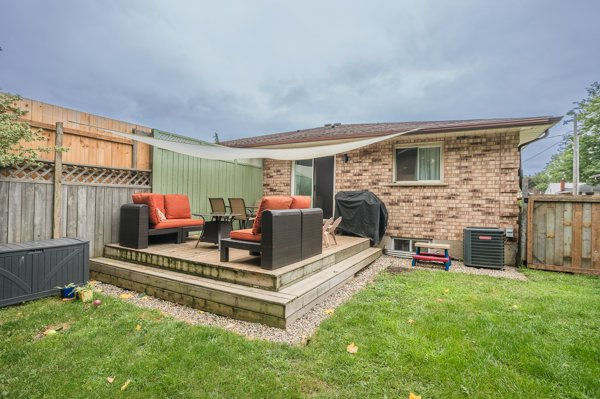
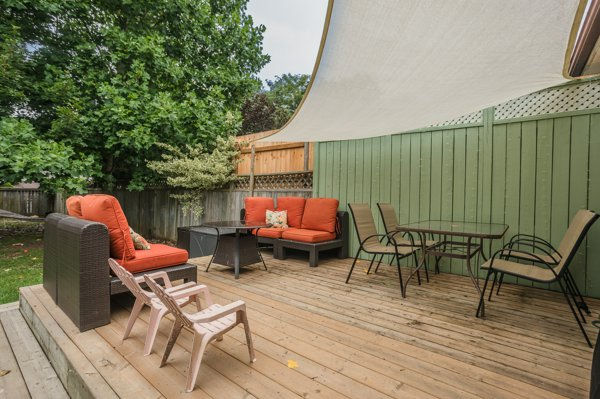
We basically rebuilt the deck from scratch, and it completely changed how we used our outdoor space. What used to be a dark, closed-in space became one of our favourite spots in the entire house. With young kids, we spent a lot of time outside and being able to comfortably watch them was a big must for me.
Before
After
Relocating the Shed
The shed was already there when we bought the house, but it wasn't in great shape, and its location cut our yard in half in a way that never worked for us. We moved it to a spot that gave the yard a much more functional flow, and replaced whatever wood had rotted along the way. Sometimes the least exciting projects make the biggest everyday difference.
Before
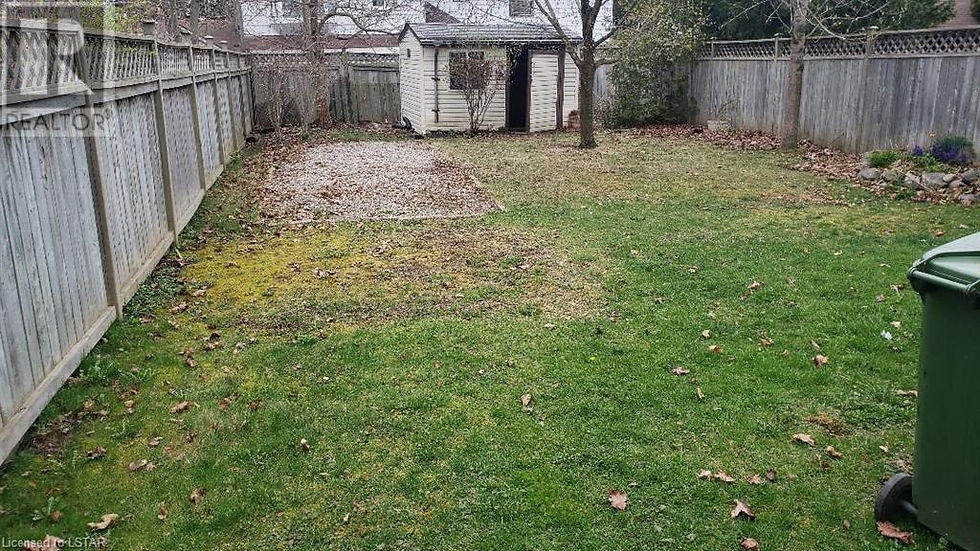
After
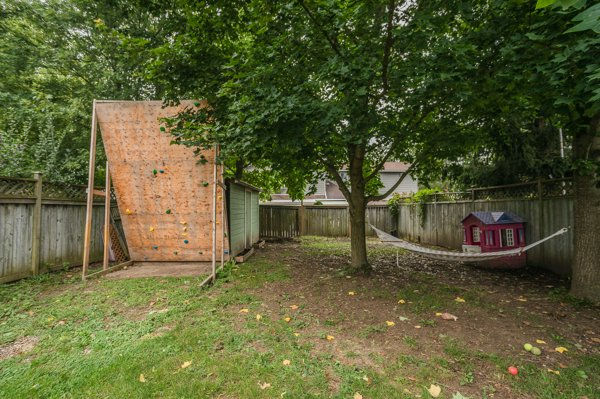
Yard Work & Landscaping
We put in serious hours getting the yard into shape, and it was worth every bit of it. A tired, overgrown yard became a space we were actually excited to spend time in.
Before
After

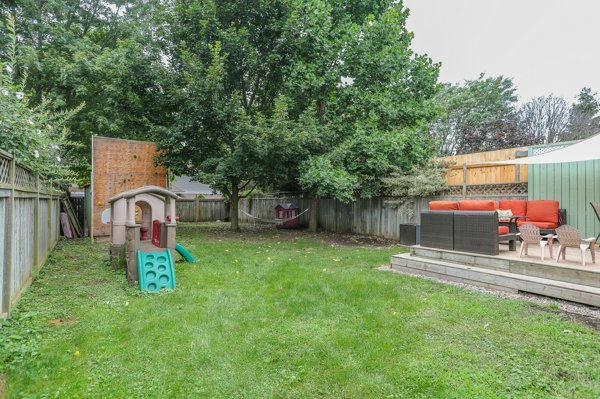
None of this happened overnight, and none of it was particularly Instagram-worthy while it was in progress. But between the new deck, the shed, and the landscaping, our outdoor space went from an afterthought to somewhere we genuinely wanted to be, which, if you ask me, is the whole point of a renovation like this.
The Details Everyone Asked About in Our House Reveal
Not every part of this renovation was about function, some of it was pure joy. Whenever we shared photos along the way, these were the three things people asked us about the most.
My Daughter's Bedroom Mural
I hand-painted a mural in my daughter's room, and it's still one of my favourite things about this whole house. If you want to see how it came together (and get a peek at the process), I shared the full story here.
The Dining Room Accent Wall
This was one of the smallest, most affordable changes we made in the whole house, and it got some of the biggest reactions every time we shared it. All it took was $82 in MDF boards, a nail gun, some paint and a little bit of creativity. It really did look good, didn't it!
Gray's Guitar Wall
This one isn't technically a renovation, more of a design choice, but it came up in comments and DMs more than almost anything else in this house. Gray displayed his guitar collection on a basement wall using these guitar holders (affiliate link), turning a hobby into one of the most talked-about corners of the house. The wall lights were also really fun. We're looking forward to hanging both up in our new house.

How Do You Stay Motivated During a Long Renovation?
Document as you go. Even rough photos and videos on your phone will mean everything later, when you can actually see the progress because when you're living in the reno, it often doesn't feel like you're making any.
Celebrate the small wins. A finished closet deserves just as much celebration as a finished kitchen.
Lean on your community. Sharing the process, the wins and the messy middle, made it feel a lot less overwhelming, and a lot more fun. I loved documenting our journey on my blog and sharing it on Instagram. You can see all the renos we did in the first 13 weeks here: Week 1, Week 2, Week 4, Week 5, Week 9, and the Weeks 10-13 budget update. And follow along on Instagram @brittanynmiller_ to watch our current renovation as it happens.
Remember why you started. On the hard days, it helped to picture the home we were building, not just the mess in front of us. I loved creating vision boards on Pinterest that I could refer back to for this very reason.
If you're in the thick of your own renovation right now, know this: the "during" always feels longer and messier than it actually is. But trust me when I say the "after" will feel so worth it! There will be weeks that feel like nothing is moving forward, and there will be projects that take three times longer than you planned. That's normal, not a sign you're doing it wrong.
What Would We Do Differently?
If I'm being honest, not much. A few things we'd tell our past selves: tackle the invisible work first, don't rush the decisions you'll be living with for years (like layout and lighting), and take more photos and videos than you think you need to. You'll want them later, whether it's for a blog post like this one or just to remind yourself how far you've come and all you learned in the process because renovating houses has been one of our biggest learning experiences, second only to parenting.
The Home Renovation We're Sharing Next
Putting this whole transformation in one place, side by side, honestly still gives me chills. This house taught us so much, about renovating, about patience, and about what "home" really means to us.
A few of you have already asked about the numbers behind all of this, what we spent, what it added up to, and how it played out when we eventually sold the house. Curious what a renovation like this actually cost us? I broke down our complete Willow Street home renovation budget, including what we spent, where we saved by DIYing, and what we ultimately made when we sold.
In the meantime, if you want the day-to-day behind-the-scenes of what we're working on now (which is another home renovation), come hang out with me on Instagram @brittanynmiller_ and if you're more of a long-form kind of person, subscribe to our YouTube for the deeper dives and some renovation tutorials.
Which transformation surprised you the most? Let me know in the comments. I'd love to hear which room you'd want the full story on next.


Comments